


Outline
- Why Build Your Own Weather Station?
- The Core Components You’ll Need
- Simple Sensors for Tracking the Elements
- Connecting It All: Microcontrollers and Display Options
- Going Digital: Logging, Apps, and Sharing Your Data
- Tuning Into the Language of the Sky
- FAQs
Why Build Your Own Weather Station?
Step outside. Look up. Feel the wind on your face. That’s the atmosphere, alive and speaking—if only we learn to listen.
Building a weather station at home isn’t just a science project—it’s a way to reconnect with your environment. It puts the forces of nature into your hands, transforms abstract weather reports into real-time data, and awakens a quiet sense of wonder.
Whether you’re a curious beginner, a gardener, a parent, or a backyard scientist, a DIY weather station helps you observe the world not as a passive consumer—but as an active participant.
And the best part? You don’t need a lab or a big budget. Just a few parts, some basic tools, and a love of discovery.
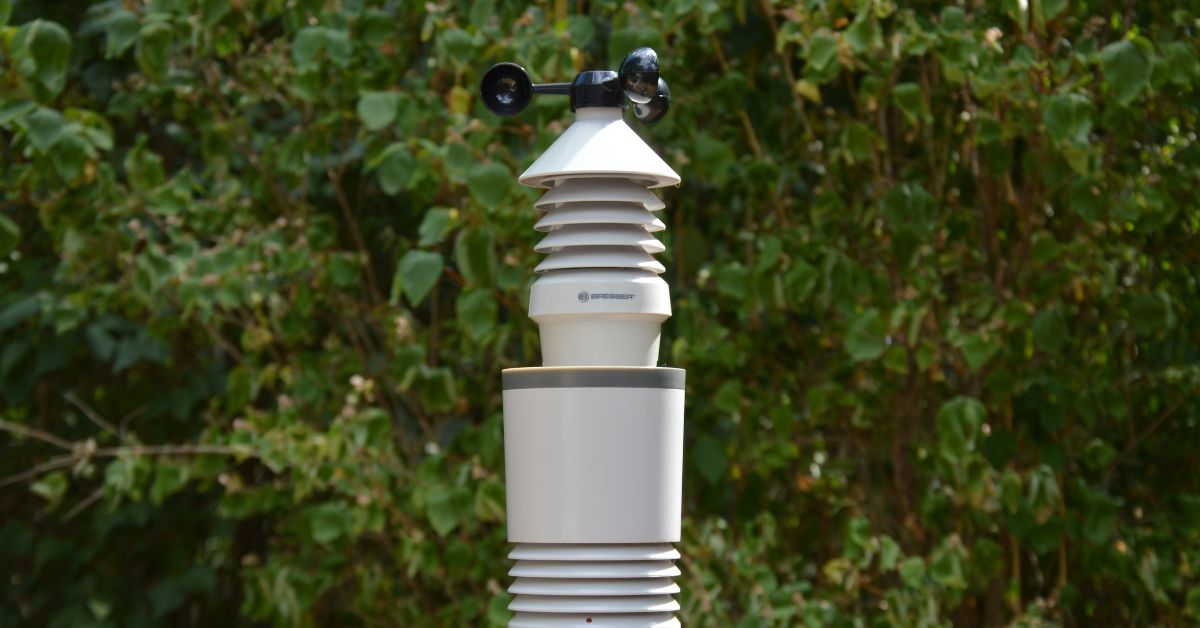
The Core Components You’ll Need
A basic weather station tracks key environmental variables. To get started, you’ll want to measure at least:
- Temperature
- Humidity
- Atmospheric pressure
- Rainfall
- Wind speed and direction
You can buy these as individual sensors or in a pre-made kit, depending on your level of comfort with electronics.
Here’s a simple component list for a beginner setup:
- A microcontroller (like Arduino Uno or Raspberry Pi)
- Sensors (DHT22 for temp/humidity, BMP280 for pressure, etc.)
- Breadboard and jumper wires
- Wind vane and anemometer (either DIY or purchased)
- A rain gauge (manual or digital)
- A small enclosure to protect the electronics from the elements
You can build it in stages—start with temperature and humidity, then expand.
Simple Sensors for Tracking the Elements
Let’s break down the basics of what your sensors will actually do:
- Temperature & Humidity Sensor (DHT22 or DHT11): Plug-and-play, inexpensive, and fairly accurate for hobbyist purposes.
- Barometric Pressure Sensor (BMP280 or BME280): Helps predict weather trends by detecting atmospheric pressure changes.
- Rain Gauge: Can be a simple tipping bucket design that clicks a switch every time a certain volume of water tips the mechanism.
- Anemometer (Wind Speed): Usually a set of rotating cups attached to a reed switch or hall-effect sensor to measure rotations per minute.
- Wind Vane: A simple rotating pointer connected to a potentiometer that reports direction based on resistance.
Many of these sensors are available in kits or from hobbyist electronics suppliers. You can even 3D-print your own parts if you’re feeling ambitious.
Connecting It All: Microcontrollers and Display Options
This is where the magic happens. Your sensors need a “brain” to read the data, process it, and send it somewhere.
- Arduino Uno is perfect for beginners. It can read sensor data, display it on a screen, or send it to your computer via USB.
- Raspberry Pi offers more power and flexibility if you want to connect to Wi-Fi, log data, or display it on a local webpage.
You can choose how to view the data:
- A small LCD screen to display real-time readings
- A serial monitor on your computer
- A simple web dashboard hosted on your local network
There’s no one right way—just the way that fits your curiosity.
Going Digital: Logging, Apps, and Sharing Your Data
Why stop at seeing weather in real-time when you can track trends over days, weeks, even years?
You can log data to a:
- CSV file on your computer or SD card
- Google Sheet via simple scripts
- Online weather platforms like Weather Underground (if you get fancy with connectivity)
There are also open-source apps that let you build custom dashboards using platforms like ThingSpeak, Home Assistant, or even Blynk for mobile.
Want to gamify it? Set up alerts when temperature drops below freezing. Plot rainfall graphs across seasons. Share your backyard data with neighbors.
You’re not just measuring the weather—you’re telling a story about where you live.
Tuning Into the Language of the Sky
We live in a time when most of us check the forecast without ever looking up. A DIY weather station brings back the art of observation. It teaches patience, curiosity, and respect for the complexity of the world outside our doors.
In building your own station, you build something else, too: a habit of attention. You start noticing changes in wind patterns, the scent of rain, the hush before a storm.
And in that noticing, you remember something vital: the planet is speaking, always. All you need is a way to listen.
FAQs
Do I need programming experience to build a weather station?
Basic programming skills help, especially if you’re using Arduino or Raspberry Pi. But there are many beginner-friendly tutorials and kits to guide you.
Can I build one without electronics?
Yes! You can create a manual station using a thermometer, rain gauge, and wind vane. It won’t log data, but it’s still a great way to learn and observe.
How accurate is a DIY station compared to commercial ones?With good sensors and careful placement, a DIY station can be surprisingly accurate—especially for local trends. It’s not lab-grade, but it’s more than enough for educational, gardening, or hobbyist use.